Electricity in Rust: Get Charged Up!
Electricity is now a reality in Rust! With it comes a whole slew of new options for base defense, lighting, quality of life, and more. This guide summarizes the core items involved with electricity and shows a couple examples of how it can be harnessed.
As with all new additions to the game, expect things to be modified and changed as new things come to light. As always, we’ll keep this guide as up to date as possible.
Quick Look Video
Don’t like reading so much? We’ve got you covered! Here’s a quick look video on electricity from Puddy.
Connectivity
The proverbial glue which ties all electric items together, the Wire Tool is the Rust electricians best friend. This item is crafted with High Quality Metal and facilitates the flow of electricity through various power hungry pieces of equipment.
To work with wire, equip it and then left click on an attachment cube of one of the devices you’d like to connect (it looks like an off white box which expands and turns yellow when you point at it). From there you can left click on the wall to pin the wire (cable management anyone?) and guide the wire to the other item you’d like to connect.
Wall in the way? No problem, simply walk around to the other side and the wire will go straight through. Each run of a wire can travel up to 30 meters or 16 pinned points. The wire tool itself has an unlimited amount of wire total at the moment, so go nuts!
Wire Tool
Used to connect electrical components together.

Research cost
Default
Crafting
5 HQM
Craft time
1 second
Workbench
Level 1 required
Recycles for
3 HQM
Power creation and storage
The first step to adding electricity to your base is to gather some power. This can be done in one of two ways: Solar Panels or Wind Turbines. Once you have that power, you’ll want somewhere to store it. That’s where batteries come into play.
Large Solar Panels
Large Solar Panels provide electricity from the sun (who'd a thunk?!). They can be placed on the ground or roofs then hooked up to batteries (or directly to other components). As you might have guessed, they only generate electricity when the sun is shining. Also, the amount of electricity generated varies depending on the intensity of the sun and angle of the panel.
Research cost
75 scrap
Crafting
25 HQM
Craft time
30 seconds
Workbench
Level 1 required
Recycles for
13 HQM
Wind Turbine
Wind Turbines provide electricity from the wind. They can be placed on the ground or roofs then hooked up to batteries (or directly to other components) and generate electricity day and night. The amount of electricity generated varies depending on the amount of wind - there is a chance for more wind at higher elevations.

Research cost
250 scrap
Crafting
1,500 Wood
30 HQM
3 Gears
10 Sheet metal
Craft time
30 seconds
Workbench
Level 2 required
Recycles for
750 Wood
15 HQM
2 Gears
5 Sheet metal
Small Rechargeable Battery
When connected to a power source, this battery will charge and store power. It can then be hooked up to other electrical items to provide them with juice.

Research cost
20 Scrap
Crafting
10 HQM
Craft time
30 seconds
Workbench
Level 1 required
Recycles for
5 HQM
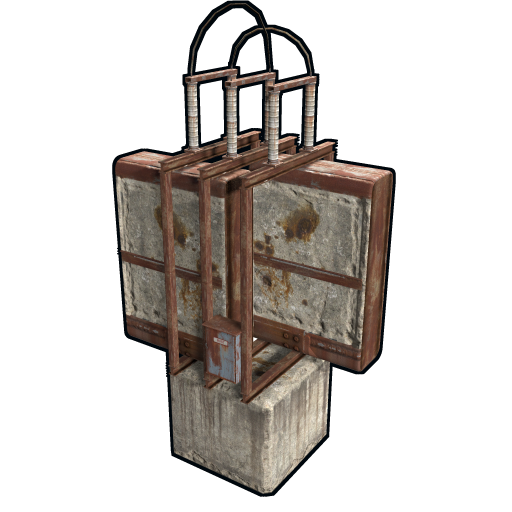
Large Rechargeable Battery
Like the Small Battery, this larger version can store and provide power to various items.
Research cost
75 Scrap
Crafting
80 HQM
Craft time
30 seconds
Workbench
Level 2 required
Recycles for
40 HQM
Switch it up
Next up, you probably want some ability to toggle this electricity on and off. For that, we’ve got a couple options: switch, pressure pad, laser detector, and timer - each one is pretty self explanatory as far as what it does. Mount them and hook up a wire to the input and output.
Switch
It’s a switch, much like the light switches in your home. Connect an input and output then toggle it on to allow power to pass through or off to block power.

Research cost
20 Scrap
Crafting
5 HQM
Craft time
30 seconds
Workbench
Level 1 required
Recycles for
3 HQM
Pressure Pad
Activated when a player steps on it, this pressure pad allows power to flow only when someone is on it. When the player steps off, the power stops flowing. At the moment, dropped objects and sleeping players do not activate this pad.

Research cost
20 Scrap
Crafting
150 Wood
1 Metal spring
1 Gear
Craft time
30 seconds
Workbench
Level 1 required
Recycles for
75 Wood
1 Gear
1 Spring ~ (50% chance)
Laser Detector
The laser detector will activate and allow power to pass through when a player is in the beam. When a player leaves the beam it will block power.

Research cost
75 Scrap
Crafting
15 HQM
Craft time
30 seconds
Workbench
Level 1 required
Recycles for
8 HQM
Timer
The timer is just like a normal switch but with the ability to turn itself off after a duration. The duration is player set anywhere from 1 to 1,000,000,000 seconds. It can also be turned on remotely by utilizing the Toggle on port.

Research cost
20 Scrap
Crafting
5 HQM
1 Gear
Craft time
30 seconds
Workbench
Level 1 required
Recycles for
3 HQM
1 Gear ~ (50% chance)
Drop some logic
Now that you’ve got a power source, switch, and some wire, you may want to step it up a notch with some logic. For this we’ve got an array of items such as a AND / OR / XOR Switches, Blocker, Counter, and Memory Cell.
These items open up a ton of opportunities for lighting set ups, traps, tracking, and more. You might want to brush up on your electrical engineering skills though, the complexity can go up drastically as you add more things into the mix.
AND Switch
The AND Switch has two inputs and one output. It only allows power to pass through if both inputs are receiving power.

Research cost
20 Scrap
Crafting
5 HQM
Craft time
30 seconds
Workbench
Level 2 required
Recycles for
3 HQM
Blocker
This item has a power in, power out, and a block passthrough input. Power will not flow if any electricity is going to the ‘Block Passthrough” slot.

Research cost
20 Scrap
Crafting
5 HQM
1 Gear
Craft time
30 seconds
Workbench
Level 1 required
Recycles for
3 HQM
1 Gear ~ (50% chance)
Counter
With power in, passthrough, increment counter, decrement counter, and clear counter slots, there are several things you can do with the counter.
It can display the power received or count up / down then allow a passthrough when a set target is reached. It can also be cleared remotely.

Research cost
75 Scrap
Crafting
10 HQM
Craft time
30 seconds
Workbench
Level 2 required
Recycles for
5 HQM

Memory Cell
The memory cell is one of the more complex electrical items. It has power in, output, inverted output, set, and reset options. It is basically a 1 bit storage component. Set input will set the value to 1. Clear input sets the value to 0. Output will provide connected power if value is 1, Inverted output will provide connected power if value is 0. Got it?

Research cost
75 Scrap
Crafting
5 HQM
Craft time
30 seconds
Workbench
Level 1 required
Recycles for
3 HQM
OR Switch
Will allow power to pass through if either inputs receive power. If both inputs have power, the output power will be equal to the larger of the two inputs.

Research cost
20 Scrap
Crafting
5 HQM
Craft time
30 seconds
Workbench
Level 1 required
Recycles for
3 HQM
XOR Switch
Allows power passthrough if only one input receives power. If both inputs receive power, it will block all power passthrough.

Research cost
20 Scrap
Crafting
5 HQM
Craft time
30 seconds
Workbench
Level 1 required
Recycles for
3 HQM

Go wireless
You now have a whole electric system and may be asking yourself how to interact with it while away, or maybe you just want to clean up some of the wires. Look no further, with a wide range of radio frequency (or RF) devices you are covered.
All RF devices operate on a broad band of frequencies (1 to 9,999) which can be set by the user. Make sure to keep your frequency a secret though, as anyone can broadcast on any frequency they choose! These radio transmissions travel instantly across the map, with no limit on range or number of devices. There are 4 items in total which make up the group: A RF Receiver, RF Transmitter, RF Broadcaster, and RF Pager.

RF Receiver
This deployable device will trigger electrical current to flow when a signal is sent on the frequency which it is set to.

Research cost
20 Scrap
Crafting
8 HQM
1 Tech trash
Craft time
30 seconds
Workbench
Level 1 required
Recycles for
4 HQM
1 Tech trash ~ (50% chance)

RF Transmitter
A handheld switch which communicates with any Receivers or Pagers on the same frequency. Hold the trigger down to activate; let go to deactivate.

Research cost
20 Scrap
Crafting
5 HQM
1 Tech trash
Craft time
30 seconds
Workbench
Level 1 required
Recycles for
3 HQM
1 Tech trash ~ (50% chance)

RF Broadcaster
Similar to the transmitter, this device sends out a radio signal on the frequency it is set to. As opposed to being handheld, however, this device is deployed and sends out a signal when an electrical current is received.

Research cost
20 Scrap
Crafting
10 HQM
1 Tech trash
Craft time
30 seconds
Workbench
Level 2 required
Recycles for
5 HQM
1 Tech trash ~ (50% chance)

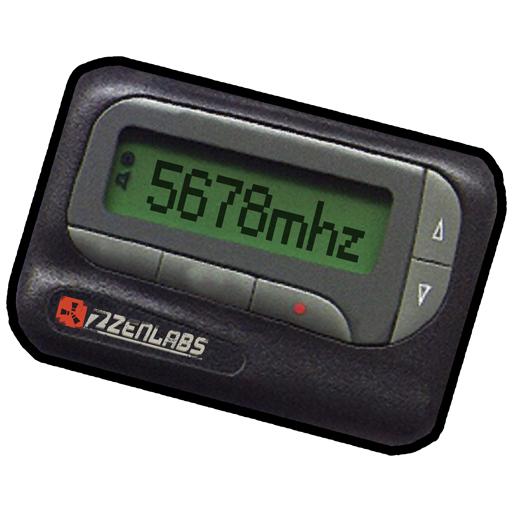
RF Pager
This handy little device will make noise (or vibrate if set to silent) when it receives a signal on the frequency it is set to.
Research cost
20 Scrap
Crafting
25 Metal fragments
1 Tech trash
Craft time
20 seconds
Workbench
Level 2 required
Recycles for
13 Metal fragments
5 Scrap
1 Tech trash ~ (50% chance)
Misc. other items
There’s several other items which utilize electricity including a door controller (for opening and closing doors) and various wiring tools like a splitter, branch, and combiner. You can also run electricity to ceiling lights to operate them.
Splitter
When power is received it will split it into three outputs. The amount of power output is equal to the amount provided, divided by the amount of outputs used.
Research cost
20 Scrap
Crafting
10 HQM
Craft time
30 seconds
Workbench
Level 1 required
Recycles for
5 HQM
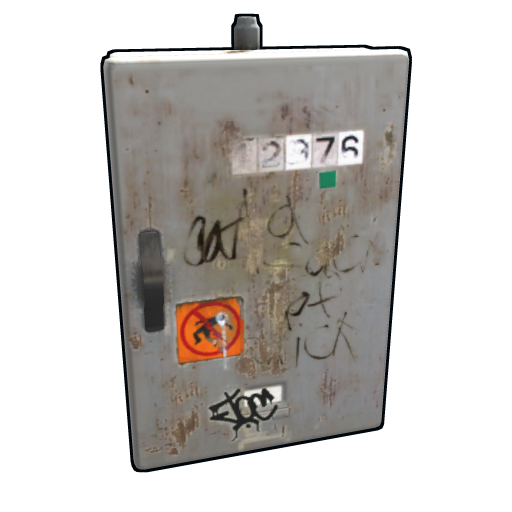
Door Controller
When power is received it will open the closest door. When power is lost will close the door.
Research cost
75 Scrap
Crafting
5 HQM
Craft time
30 seconds
Workbench
Level 1 required
Recycles for
3 HQM
Electrical Branch
Will split power into two outputs. One output is customisable on how much power it will take. Can be set between 1 and 10,000,000.
Research cost
20 Scrap
Crafting
3 HQM
Craft time
30 seconds
Workbench
Level 1 required
Recycles for
2 Scrap
Root Combiner
Combines two power sources into a single output. Useful for combining together low energy batteries or solar panels to produce a higher power output.

Research cost
75 Scrap
Crafting
5 HQM
Craft time
30 seconds
Workbench
Level 1 required
Recycles for
3 HQM

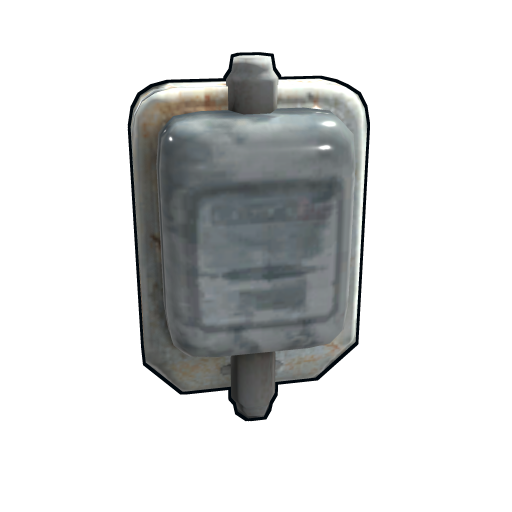
HBHF Sensor
A way of sensing the presence of others. The Heartbeat, Breathing, Humidity, and Footstep Sensor (or HBHF for short) is triggered when anyone in direct line of sight shows up within 20 meters of where it is placed.
Configured with a hammer, it can be set to go off when authorized or unauthorized people are in range. This allows for multiple uses, from sounding the alarm when intruders are about, to automatically turning the lights on when teammates arrive back home.

Research cost
75 Scrap
Crafting
15 HQM
1 Tech trash
Craft time
30 seconds
Workbench
Level 2 required
Recycles for
8 HQM
1 Tech trash ~ (50% chance)

RAND Switch
The RAND switch does exactly what it sounds like: when current runs through, it randomly chooses between true and false. Although the practical uses for this switch may elude you at first, it does open up some interesting possibilities for traps, contests, and games.

Research cost
20 Scrap
Crafting
5 HQM
1 Gear
Craft time
30 seconds
Workbench
Level 1 required
Recycles for
3 HQM
1 Gear ~ (75% chance)

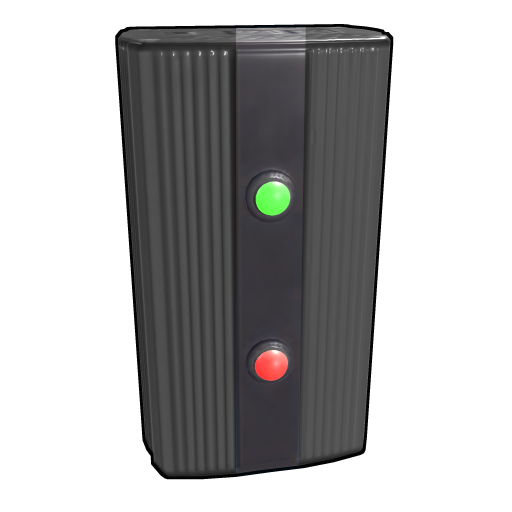
Audio Alarm
The Audio Alarm sounds - you guessed it - an alarm when electricity flows to it. Used in conjunction with the HBHF sensor, this could be a handy tool to be alerted when an unwanted visitor comes by.

Research cost
20 Scrap
Crafting
5 HQM
Craft time
15 seconds
Workbench
Level 1 required
Recycles for
3 HQM

Flasher Light
Blue light which pulses quickly 3 times every couple of seconds.

Research cost
20 Scrap
Crafting
5 HQM
Craft time
30 seconds
Workbench
Level 1 required
Recycles for
3 HQM

Siren Light
Red light which spins around in 360 degrees.
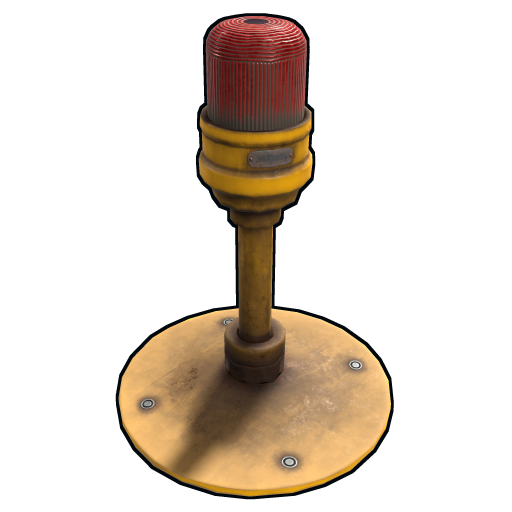
Research cost
20 Scrap
Crafting
5 HQM
Craft time
30 seconds
Workbench
Level 1 required
Recycles for
3 HQM
Examples
Here are a couple of examples of how electricity can be used. The first two are pretty straight forward, the last one is a bit more complex.
Simple remote door control
In the above image, there is a solar panel attached to a battery to charge during the day. The battery is connected to a switch. The switch is connected to a door controller. When the switch is flipped on the door will remain open, when the switch is flipped off the door will close. If a door camper kills you, quickly respawn in base and flip the switch to on then off to close your door. You can also trade out the switch for a timer with a time of 1 second so it will automatically toggle itself off after you flip it.
Required components
1 Large solar panel
1 Small rechargeable battery
1 Switch
1 Door controller
Total cost
45 HQM
Master light switch
In the above image, there is a solar panel attached to a battery to charge during the day. The battery is connected to a switch. The switch is connected to a ceiling light. The ceiling light is then connected to a second ceiling light and that one to a third. When the switch is flipped on all three lights will turn on, when the switch is flipped off all three lights will turn off.
Required components
1 Large solar panel
1 Small rechargeable battery
1 Switch
Total cost
40 HQM
Basic trap base
Ok, this one's a bit more complex. Long and short: a door is left open. When someone walks through the door, they step on a pressure pad which closes the door behind them and opens the closed double doors (which have shotgun traps behind them).
For ease of showing off, we’ve done an open view of the circuitry. In actual application, you’d enclose all this stuff in a confined space with the closed double doors (with traps behind) pointing at the open door / pressure pad.
Build steps:
1. Start by getting a power source. In this example I used a wind turbine.
2. Connect the splitters together to split into 4 power outputs. The splitter connected to the wind turbine is the primary splitter.
3. Connect the primary splitter to a timer’s power input. This will be timer A.
4. For the last output of the primary splitter, connect it to a memory cell’s power input.
5. Connect the second splitter to the power-in port of a pressure pad.
6. Connect the second splitter to the second timer’s power input. This will be timer B.
NOTE: The last output of the second splitter is not used.
7. Connect the power-out of the pressure pad to the reset port on your memory cell.
8. Connect the timer A to the set port of your memory cell.
9. From the memory cell, connect the inverted output port to the toggle on port of timer B.
10. Connect the output of the memory cell to a door controller located at your entrance.
11. For the final connection, link the output port of timer B to a door controller with the traps.
12. Set timer A's time to 1 second and timer B's time to however long you would like the trap door to remain open.
Verification steps:
1. Close all doors.
2. Verify memory cell has a green and red light.
Note: To toggle the bottom light of your memory cell step on the pressure pad.
3. Manually flip timer A to open the front door. The memory cell should have two green lights now.
4. Step on the pressure pad. The front door should close and trap door should open.
Note: Repeated pressure pad activations will only open the trap door.
Note: It’s recommended to cover the pressure pad and wires with sleeping bags, rugs, bear skins, etc. to make it look as safe as possible.
Required components
1 Wind turbine
2 Splitters
2 Timers
2 Door controllers
1 Memory cell
Total cost
1,500 Wood
75 HQM
10 Sheet metal
5 Gears